
Vaping has become a popular alternative to traditional smoking, but like any device, it can encounter problems. One common issue is a burnt vape, which can ruin your vaping experience. But don’t worry, we’ve got you covered.
This article will guide you on How to Make a Vape Unburnt, ensuring you can enjoy your vaping sessions without any hitches.
Vaping has surged in popularity as an alternative to smoking, but dealing with a burnt tasting vape can put a damper on the experience. Fortunately, with the right troubleshooting, you can get your vape tasting fresh again. This comprehensive guide will walk through simple steps to clean and refresh burnt vape coils.
What Causes a Vape to Burn?
Before we dive into the solution, it’s important to understand the cause of the problem. A vape burns when the coil, which heats the vape juice, gets coated with residue or the wick dries out. This can result in a burnt taste when you inhale.
Causes a Vape Coil to Burn?
Before jumping into solutions, it’s important to understand what causes a vape coil to burn in the first place.
Built Up Gunk and Residue
The main culprit behind a burnt vape coil is a buildup of residue inside the coil and on the wicking material. This gunky residue is created from the ingredients in ejuice heating up and condensing inside the coil and wick. Sugary sweet ejuice flavors in particular can leave behind sticky residue [1].
As residue builds up over repeated use, it restricts proper juice flow to the coil. Without adequate saturation, the cotton wick dries out. This leads to burning and that unpleasant singed taste on your next vape hit.
Low Quality Ejuice
Cheap ejuice made with low grade ingredients can also accelerate gunking and burning of coils [2]. Avoid vape juice with food coloring or excessive sweeteners. Stick to premium juices for cleaner, purer vaping.
Failing to Prime Coils
It’s crucial to properly prime new replacement coils before use by saturating the cotton wick with ejuice. Skipping this priming step leads to dry hits and burning. Let new coils soak in juice for at least 10-15 minutes before vaping.
Burning Out from Overuse
Coils have a finite lifespan. Vaping heavily at higher wattages will degrade coils faster. Typically, vape coils last 1-2 weeks before needing replacement [3].
Stay mindful of signs of aging coils like declining vapor quality, dark residue, and muted flavor. A burnt taste means it’s time for a fresh coil.
How to Make a Burnt Vape Coil Taste Normal Again
When you notice a burnt taste, don’t toss the coil just yet! With a few simple cleaning steps, you can restore coils to like-new condition.
Step 1: Remove the Coil
The first step in unburning a vape is to remove the coil. This is the part of the vape that heats up and vaporizes the juice.
Start by removing the coil from the atomizer housing. Refer to the vape device manual for proper coil removal technique.
Here is a general overview:
- Unscrew the tank from the battery and empty the tank of juice.
- Unthread the coil base to reveal the coil. Gripping it firmly, pull the coil out.
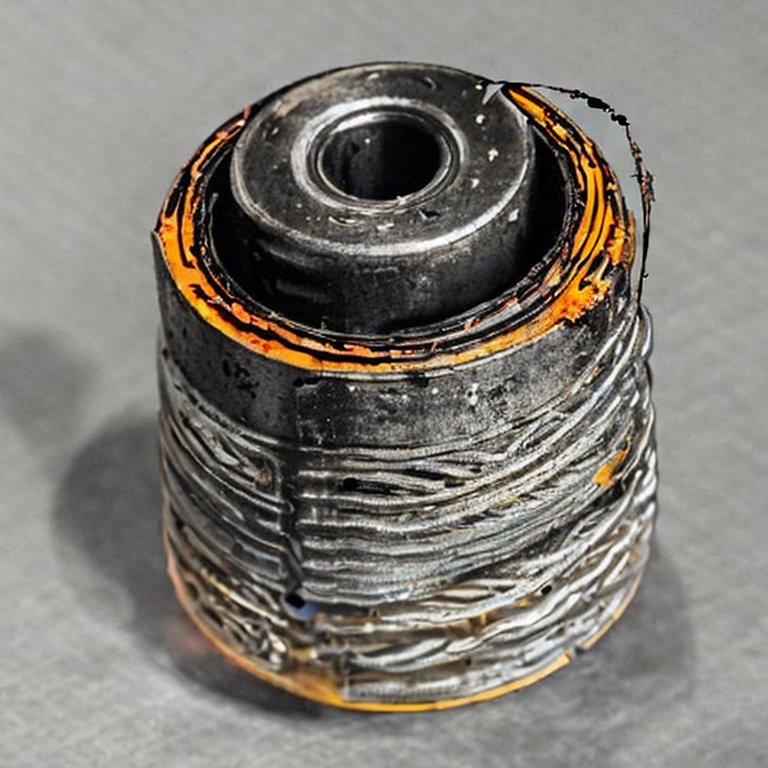
- Inspect for heavy residue buildup or scorching. If badly damaged, replacement is needed.
Step 2: Soak the Coil
Next, soak the coil in ethanol or vinegar for several hours. This will help to dissolve any residue that might be causing the burnt taste.
Step 3: Rinse and Dry
After soaking, rinse the coil with water and leave it to air dry. Make sure it’s completely dry before you reassemble your vape.
Step 4: Clean the Coil with Vinegar or Grain Alcohol
The key to removing gunk is to soak the coil in a cleaning solution that breaks down residue.
Your best options are distilled white vinegar or high-proof grain alcohol, such as Everclear. The acetic acid in vinegar dissolves buildup while alcohol’s solvent properties cut through sticky gunk [4].
To clean with vinegar:
- Submerge the coil in a bowl of undiluted white vinegar.
- Let soak for 1-2 hours until bubbling stops.
- Longer soaking times up to 4 hours may be needed for extremely dirty coils.
To clean with alcohol:
- Soak the coil in a bowl filled with 99% isopropyl or 190-proof grain alcohol like Everclear.
- Allow to soak for 2 hours, shaking periodically.
- The strong solvent properties help dissolve stubborn buildup.
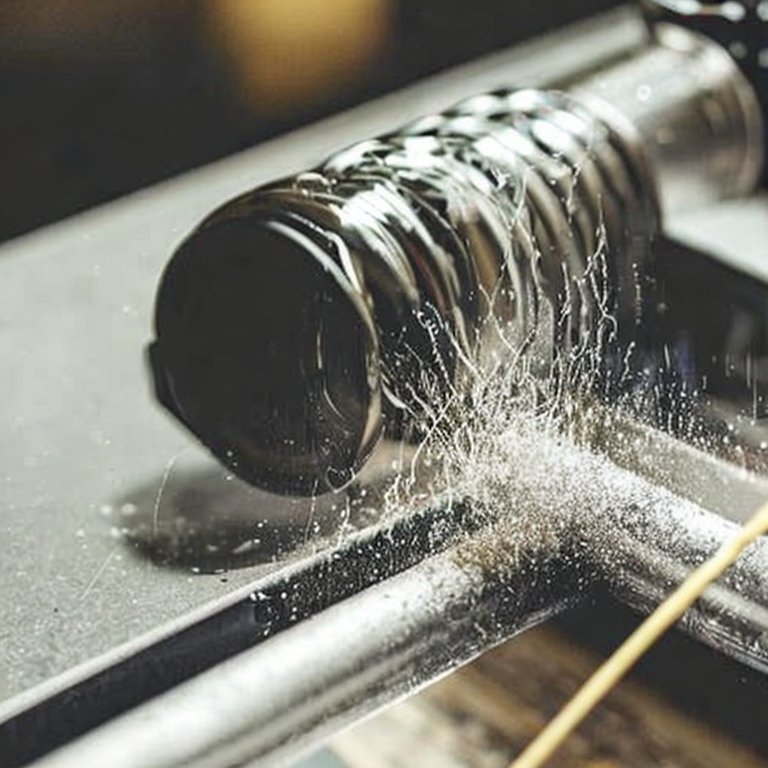
Letting a coil soak in vinegar or alcohol helps remove gunk
Step 5: Rinse and Dry Thoroughly
After soaking, remove the coil and rinse under cool running water. Allow to air dry completely for at least 24 hours.
It’s critical to fully dry the coil’s cotton wicking material before reusing to prevent further gunking from moisture.
Rinsing the coil after soaking helps remove residual cleaning solution
Step 6: Check for Improvement in Performance
Once fully dry, re-install the cleaned coil and re-saturate it with ejuice. Let it prime for 10 minutes.
Take a test puff and check if the burnt taste is gone. If not, repeat the soaking and cleaning process.
With sufficient cleaning, the coil should perform like new again!
When to Replace Instead of Cleaning Burnt Coils
While cleaning can revive slightly burnt coils, heavily damaged ones need replacement.
Signs a burnt coil is beyond saving:
- Visibly scorched wick
- Bubbled or melted insulation
- Warped or deformed shape
- Can’t pass the “taste test” after cleaning
It’s not recommended to dry burn or torch coils to remove gunk as this can damage the metals and cotton.
Ideally, coils should be replaced every 1-2 weeks to maintain top vaping performance.
Pro Tips to Extend Coil Lifespan
With proper care, you can maximize coil lifespan beyond the average 1-2 weeks. Follow these best practices:
Break In New Coils Gradually
Avoid vaping at the maximum wattage on a new coil. Break it in slowly over the first day, starting at the lowest setting and working upwards. This prevents burning the cotton.
Clean Tank & Change Ejuices Regularly
Residue, oils, and juices can carryover between fill ups. Regularly clean the tank with water and replace ejuice flavors to prevent gunk buildup.
Avoid Chain Vaping
Take a few minutes between puffs to allow the coil to re-saturate with juice. Chain vaping can lead to dry spots and burning.
Store Vape Mod Properly
Don’t leave vape devices sitting in hot cars or direct sunlight, which can thin ejuice, dry coils prematurely, and hasten breakdown of metals.
Proper Coil Disposal
With regular replacement, you’ll accumulate used coils over time. It’s important to dispose of them responsibly.
Coils contain small amounts of metals that can contaminate groundwater if landfilled. Check your city’s hazardous waste disposal guidelines. Vape shops often collect used coils for recycling.
You can also mail back coils to vape manufacturers that offer recycling programs, such as VUSE. This helps prevent coil waste from harming the environment.
Get the Most Out of Your Vaping Experience
While the occasional burnt hit is inevitable with prolonged vaping, you don’t have to let it ruin your enjoyment. Follow these best practices to clean, extend, and properly dispose of burnt coils.
With the right maintenance, you can delight in clean, fresh tasting vapor from each puff. Your coils and tastebuds will thank you!
Conclusion
Unburning a vape is a relatively simple process that can greatly improve your vaping experience. By regularly cleaning or replacing your coil, you can prevent a burnt taste and keep your vape in top condition.
Also Check: How to Reset a SMOK Vape: A Step-by-Step Guide
Frequently Asked Questions
Key Points:
- A vape burns when the coil gets coated with residue or the wick dries out.
- To unburn a vape, remove the coil, soak it in ethanol or vinegar, then rinse and dry.
- You can fix a burnt-out vape by cleaning or replacing the coil.
- To save a burning vape, ensure the liquid soaks all of the coils.
- If cleaning doesn’t work, you may need to replace the coil.
Remember, a well-maintained vape is a happy vape! Happy vaping!
