
Direct Answer: Fixing a broken wire on a disposable vape involves identifying the broken wire, straightening it gently, and using a non-conductive adhesive to secure it back in place. It’s a delicate process, but with patience and care, you can get your vape back in working order.
Introduction
Vaping has become a popular alternative to traditional smoking, and disposable vapes, in particular, are favored for their convenience. However, like any electronic device, they can encounter issues. One common problem is a broken wire.
But don’t fret! This guide will walk you through the process of fixing a broken wire on your disposable vape.
Understanding the Problem
Why Do Wires Break in Disposable Vapes?
Wires in disposable vapes can break due to various reasons such as rough handling, manufacturing defects, or simply wear and tear over time. Understanding the cause can help prevent future wire breakages.
The Fixing Process
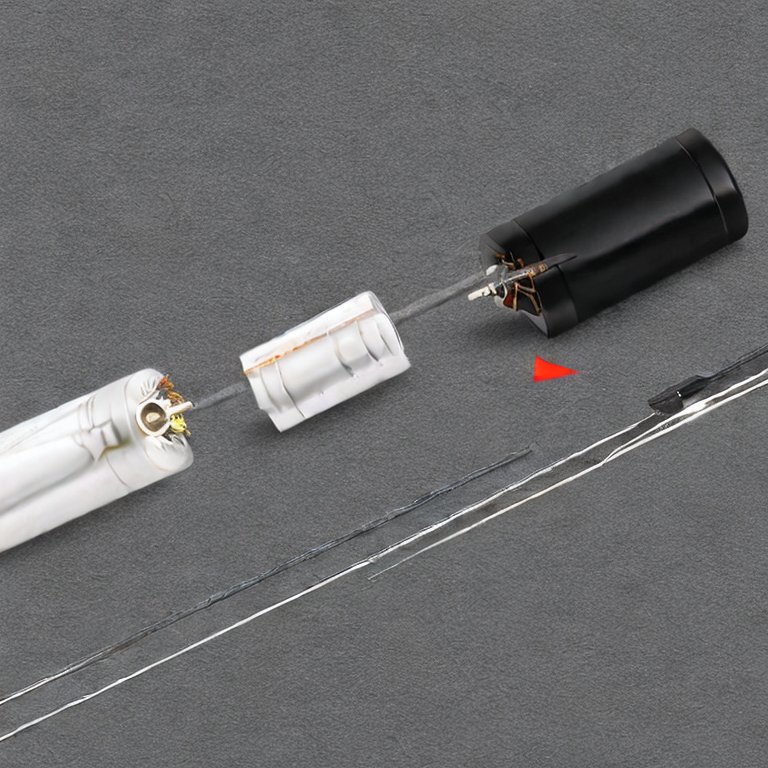
The first step in fixing your vape is identifying the broken wire. This usually involves unscrewing the vape pen heating chamber and inspecting the wires within.
The Fixing Process
The first step in fixing your vape is identifying the broken wire. This usually involves unscrewing the vape pen heating chamber and inspecting the wires within.
Identifying the Broken Wire
The process typically involves using specialized tools such as a multimeter or a continuity tester to check if the electrical current is flowing through the wire. If the tool indicates that there’s no continuity or the resistance is too high, it means the wire is broken or damaged.
Straightening the Wire
Once you’ve identified the broken wire, the next step is to straighten it. This can be done by gently pulling the wire until it is straight. Be careful not to pull too hard as this could cause further damage.
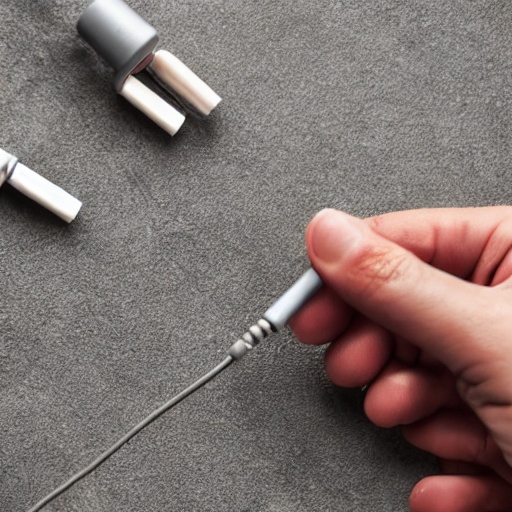
Securing the Wire
After straightening the wire, you’ll need to secure it back in place. This can be done using a non-conductive adhesive such as nail polish. Apply the adhesive and wait for it to dry.
Read also: How Long to Charge Hyde Vape 4500 Puffs
Vape Wire Connection
Vape wire connections refer to the wiring between the battery and atomizer in vape devices. Proper wire connectivity allows electric current to heat vape coils. Issues like loose wiring, corrosion, and fraying can cause connection problems. Inspect wires and secure loose connections. Avoid exposing wires to moisture or damage.
Broken Vape Device
Common issues with broken vape devices include non-functioning batteries, damaged wire connections, cracked tanks/cartridges, leaky seals, and malfunctioning heating elements. Troubleshoot specific problems. For total failure, a new vape device may be needed if unrepairable. Avoid forceful handling to prevent damage.
Disposable Vape Issues
Troubles with disposable vapes include weak hits, fast battery drain, burning taste, clogging, leaking, blinking lights, and not producing vapor. Issues arise from defective heating, expired juice, fully depleted battery, and buildup. Replace defective pens. Proper handling and storage preserves longevity.
Vape Pen Battery Repair
Options for vape pen battery repair depend on the specific issue. Rechargable batteries may need a new USB port soldered on or protective circuit board replacement. Totally dead batteries require replacement. Take caution working with lithium-ion batteries. Consider professional repair or new battery.
Read also: https://howtovape.pro/how-to-fix-an-overcharged-vape-battery/
Vape Wire Replacement
Replacing burnt out or damaged vape wires involves disconnecting the old wires, stripping the wire ends, cutting suitable lengths of fresh wire, securing new wire ends to posts, then reconnecting everything properly. Use wiring diagrams to recreate original configurations. Avoid kinks and shorts in new wiring.
Troubleshooting Vape Problems
Strategies for troubleshooting vape issues include checking power connections, testing components individually, cleaning dirty parts, replacing defective elements, ensuring proper handling/usage, consulting manufacturer guidelines, and confirming e-liquid quality. Determine root cause before attempting repairs.
Vape Pen Maintenance
Proper vape pen maintenance involves keeping batteries charged, monitoring e-liquid levels, cleaning tank and connections, replacing worn parts, securely assembling components, protecting from damage, checking o-rings and seals for fit, and following manufacturer usage/storage instructions. This maximizes performance and lifespan.
Charging Vape Without Charger
If lacking the standard USB vape charger, look for another USB compatible cable, car charger, computer port, or portable charger with matching connector. Ensure voltage/wattage suitability. Avoid dubious power sources risking harm. Improvised charging should be temporary, acquiring the proper charger is ideal.
Read also: https://howtovape.pro/how-to-reset-smok-vape/
Fixing Cut Wire
First identify which wire is cut – positive or negative. Cut back insulation to expose clean copper on good wire end. Attach splice connector or solder on new wire length matching cut wire gauge. Insulate connection. Reconnect spliced wire properly without shorting. Test repair before reassembling vape.
Vape Residue Cleaning
Vape residue builds up on heating coils and tanks during use. To clean, disassemble vape completely and rinse coated parts with warm water. Scrub gently with cotton swabs soaked in isopropyl alcohol to dissolve residue. Rinse thoroughly and allow to fully dry before reusing. Avoid wet electrical components.
Vape Wire Diagram
Vape wiring diagrams illustrate how to properly connect positive and negative wires between batteries and heating elements like coils or atomizers. They identify contact points, polarities, splicing, accessories, length, and routes of wires. Follow diagrams carefully when replacing wires to avoid dangerous shorts.
Gurgling Disposable Vape
Gurgling sounds in disposable vapes usually indicate e-liquid flooding the atomizer. Try wiping any excess from the air path and take gentler puffs. Also store device upright when not puffing to prevent leaks inside through air intake. The coil may need replacing if flooding persists in reusable vapes.
Read also: https://howtovape.pro/deltiva-disposable-vape-how-to-use/
Broken Vape Components
Broken vape parts like damaged batteries, cracked tanks, stripped threads, worn out heating coils and leaky seals can often be replaced with new components compatible with the specific vape model. Careful disassembly and reassembly is required. Some total failures require replacement of the entire vape device.
Disposable Vape Troubleshooting
Common disposable vape issues requiring troubleshooting include weak/little vapor production, fast battery drain, burning taste, blinking lights, leaking, clogging and gurgling. Try cleaning connections and gentler puffs. Typically a dead battery or dried out heating coil means replacing the cheap disposable pen.
Vape Wire Safety
To safely handle vape wires: avoid fraying insulation, prevent shorts, don’t overload amperage rating, use proper gauge and lengths, ensure secure connections to prevent overheating, inspect regularly for damage, keep wires away from hot surfaces, don’t modify or tamper with wiring.
Read also: https://howtovape.pro/how-to-charge-a-backwoods-vape-pen/
Reconnecting Broken Wire
Steps to reconnect a broken vape wire: Strip back insulation on both wire ends, twist strands tightly, solder for permanent splice or fasten with mechanical connectors, insulate splice, properly reconnect positive and negative wires without reversing polarity, check repair before powering device.
Vape Pen Wire Configuration
Vape pen internal wiring connects the battery positive and negative terminals to contact points for the heating coil, tank or cartridge. This creates a complete electric circuit to heat e-liquid when activated. Dual battery mods can be wired in series or parallel to adjust voltage/capacity.
Vape Residue on Windshield
To remove vape residue on car windshields: Gently scrape off bulk residue with a plastic scraper. Apply glass cleaner sparingly and wipe slowly with a microfiber cloth. Rub stubborn stains gently with a magic eraser sponge. Rinse and air dry. Avoid abrasive scrubbing that can scratch the glass.
Disposable Vape Battery Issues
Common disposable vape battery problems include rapid draining, blinking lights indicating low charge, electrical shorts from damage or vapor liquid leaks, and dead batteries that will not hold any charge. These issues mean the cheap one-time use battery must be disposed of along with the spent vape pen.
Read also: https://howtovape.pro/how-to-refill-a-swft-vape/
Vape Pen Wire Types
Vape pen wiring uses thin gauge multi-strand wires with durable insulation to handle heating element currents. Common vape wire includes 22-30 AWG Kanthal resistance wire, nichrome heating wire, braided insulated wire, silicone-sheathed wire and toughened cable wire for longevity.
Conclusion
Fixing a broken wire on a disposable vape might seem like a daunting task, but with this guide, you’re well-equipped to tackle the problem head-on. Remember, patience is key, and if you’re ever in doubt, it’s best to consult with a professional or consider getting a replacement. Happy vaping!
Read also: How to Get Vape Residue Off Your Windshield
People also ask
Key Takeaways
- Broken wires in disposable vapes can be fixed by identifying the broken wire, straightening it, and securing it back in place with a non-conductive adhesive.
- The process requires patience and care to avoid causing further damage.
- Understanding why wires break can help prevent future issues.
Author’s Note: As a seasoned vape technician, I’ve encountered and fixed numerous broken wires in disposable vapes. While this guide provides a general process, remember that each vape model is unique and may require slightly different steps. Always refer to your vape’s user manual for specific instructions.
